Importing a Lightroom Catalog into PhotoPicker (macOS)
1. Transferring a Catalog Archive via AirDrop
To create and transfer a Lightroom catalog archive, follow these steps:
1. Create an Archive:
Navigate to the folder containing your Lightroom catalog.
Right-click on the catalog folder and select Compress from the context menu. This will create an archive using macOS’s built-in archiving tool.
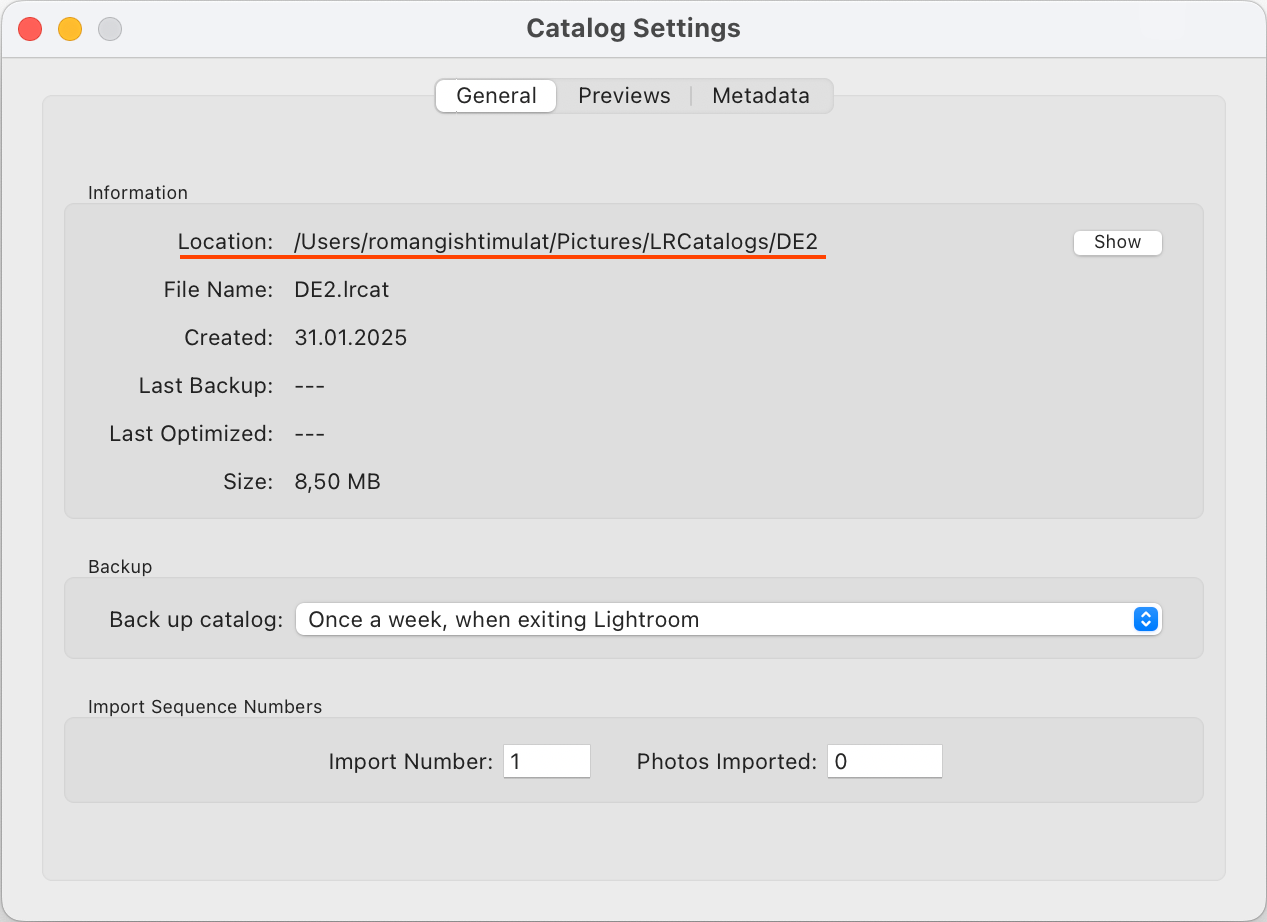
To find the current catalog path, open Catalog Settings in Lightroom Classic:
Go to Menu → Lightroom Classic → Catalog Settings…
The catalog path will be displayed in the settings window, which you can use to access and archive the catalog.

2. Transfer the Archive via AirDrop:
Open Finder and locate the created archive.
Right-click the archive and select Share → AirDrop.
Choose your device with the PhotoPicker app installed.
On your device, wait for the transfer to complete. A notification will appear upon successful transfer.
3. Open the Archive in PhotoPicker:
Tap the notification and select Open in PhotoPicker.
If the notification does not appear or was dismissed, open the file manually: In the Files app, tap the Export button and choose PhotoPicker from the list of apps.
4. Automatic Catalog Extraction:
Once the archive is transferred and opened in PhotoPicker, the app will automatically begin extracting the catalog.
After extraction, the archive will be deleted from the Files app to free up space on the device.
The catalog will then appear in the list of available catalogs in PhotoPicker.
You can now begin working with your photos—sorting them, applying flags, ratings, and color tags.
2. Transferring a Catalog via Finder
To transfer a Lightroom catalog to PhotoPicker using Finder on macOS, follow these steps:
1. Connect your device:
Connect the device with the PhotoPicker app (iPad or iPhone) to your Mac via a cable.
2. Open Finder:
In the Finder sidebar, select the connected iPad or iPhone
Navigate to the Files tab in the Finder window.
Locate PhotoPicker in the list of apps
3. Copy the catalog:
On your computer, select the following two items simultaneously:
The catalog file: *.lrcat
The previews folder: * Previews.lrdata
Drag and drop these items onto the PhotoPicker app entry in Finder
4. Monitor the transfer progress:
A progress indicator will appear at the bottom of the Finder window
Wait for the file transfer to complete.
5. Refresh the catalog list:
Once the transfer is complete, open the PhotoPicker app on your device.
Perform a pull-to-refresh gesture by pulling down the catalog list and releasing it to update.
The catalog will now appear in PhotoPicker, and you can begin working with your photos—sorting, flagging, and applying ratings and color tags.
3. Transferring a Catalog via FTP Server
To transfer a catalog to the PhotoPicker app using FTP, follow these steps:
1. Connect devices to the network:
Ensure that both your device with PhotoPicker and your computer are connected to the same Wi-Fi network.
2. Start the FTP server:

In the PhotoPicker app, tap the FTP icon
A window will appear showing the server connection parameters (address, port)
3. Copy files via FTP:
On your computer, use an FTP client, such as Cyberduck (or a similar application).
Enter the connection parameters displayed in PhotoPicker
Connect to the FTP server
4. Ensure proper file structure:
In the root directory of the FTP server, place the following items:
The catalog file: *.lrcat
The previews folder: * Previews.lrdata
Important: Do not copy the entire catalog folder. The .lrcat file and Previews.lrdata folder must be copied directly to the root of the server.
5. Limitations of the macOS native FTP client:
The built-in FTP client on macOS only supports downloading files from servers and does not allow uploading files. Therefore, it is recommended to use third-party FTP applications, such as Cyberduck.
Last updated